Hello and welcome to our Home Depot virtual online party!
Thanks to Home Depot for sponsoring today’s post and party!
I’m excited to share what I’ve been working on the last few days! In case you missed it, four of my fellow blogger friends and I are partnering with The Home Depot for a fun Do-It-Herself Workshop! If you love DIY projects, I invite you to grab your favorite drink and learn more about my seasonal character door hanger reveal with The Home Depot!

Here’s our list of creative bloggers:
Sandra at The Rustic Life
Amy at Tonality Designs
Summer at She Leaves A Little Sparkle
Amy at One Artsy Mama
And me, Alicia at Our Vintage Nest
Click on the links below to view more versions of this fun project:
Live Laugh Rowe
The Turquoise Home
Cherished Bliss
TIDBITS
Refresh Restyle
The Creative Mom
My Sister’s Suitcase
My Love 2 Create
Sweet Charli
Not Just A Housewife
Domestically Speaking
Lovely Etc
Redhead Can Decorate
Yesterday on Tuesday
Elizabeth Joan Design
The Rustic Life
One Artsy Mama
Tonality Designs
She Leaves A Little Sparkle
All Things Thrifty
Our Thrifty Ideas
Junque Cottage
The Crafted Sparrow
Sweet Rose Studio
And me, Alicia at Our Vintage Nest
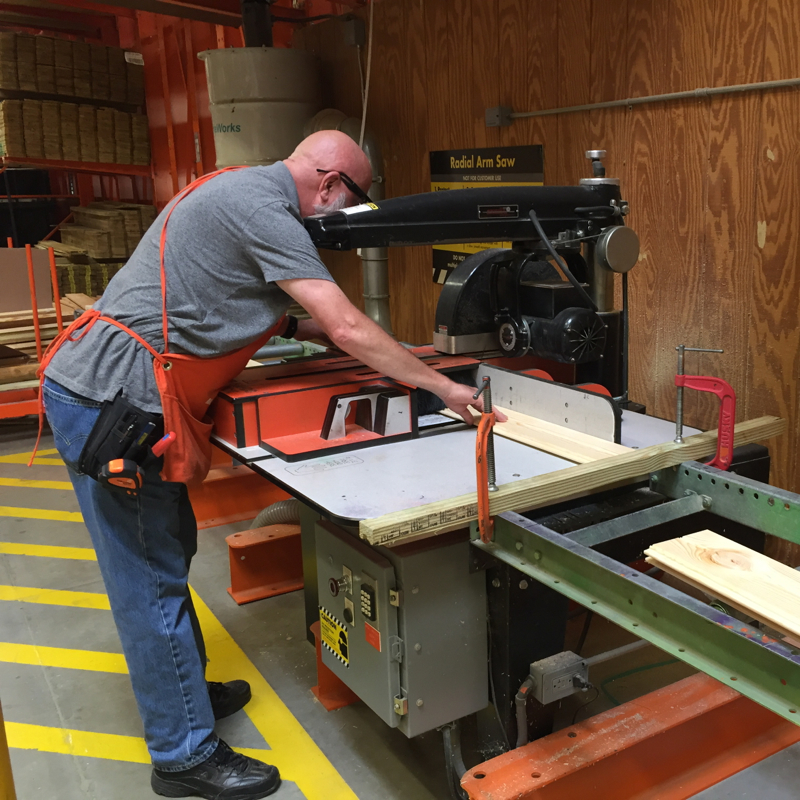
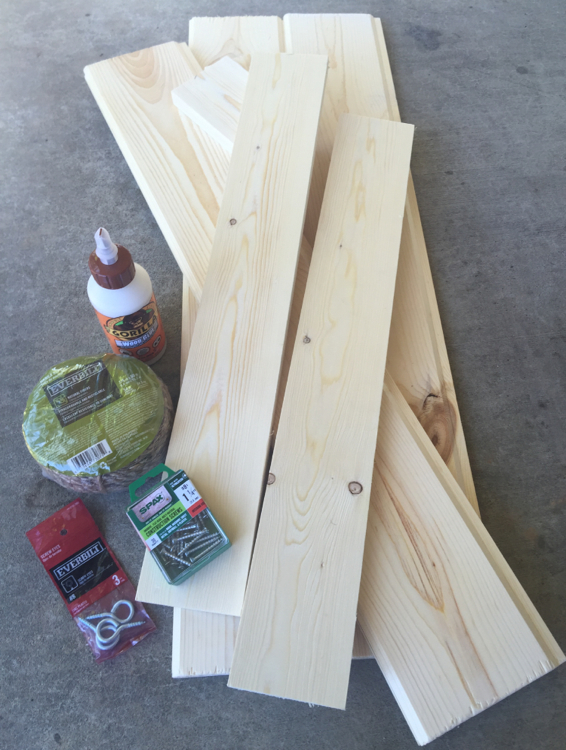
I didn’t need much for this fun project, just a few easy tools and supplies! The kind men in the HD lumber department assisted me in cutting the wood required for this DIY!
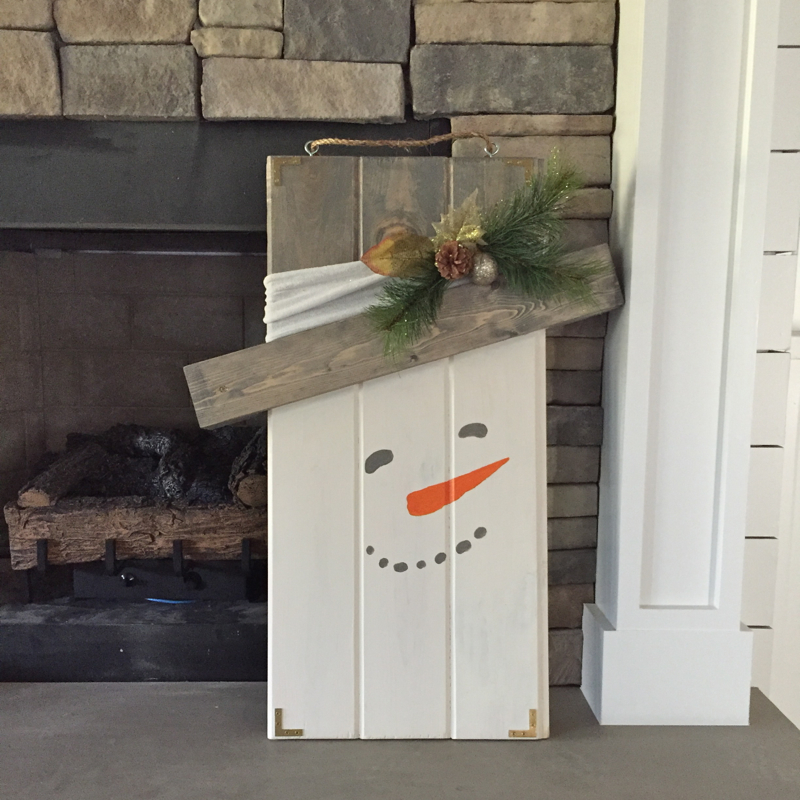
 Once assembled, I used a few paint and and stain supplies to bring my character to life. Since I love to decorate with neutrals and antiques, the obvious choice was to create a vintage snowman, perfect for Our Vintage Nest! I love the colors and names of these paints from Americana!
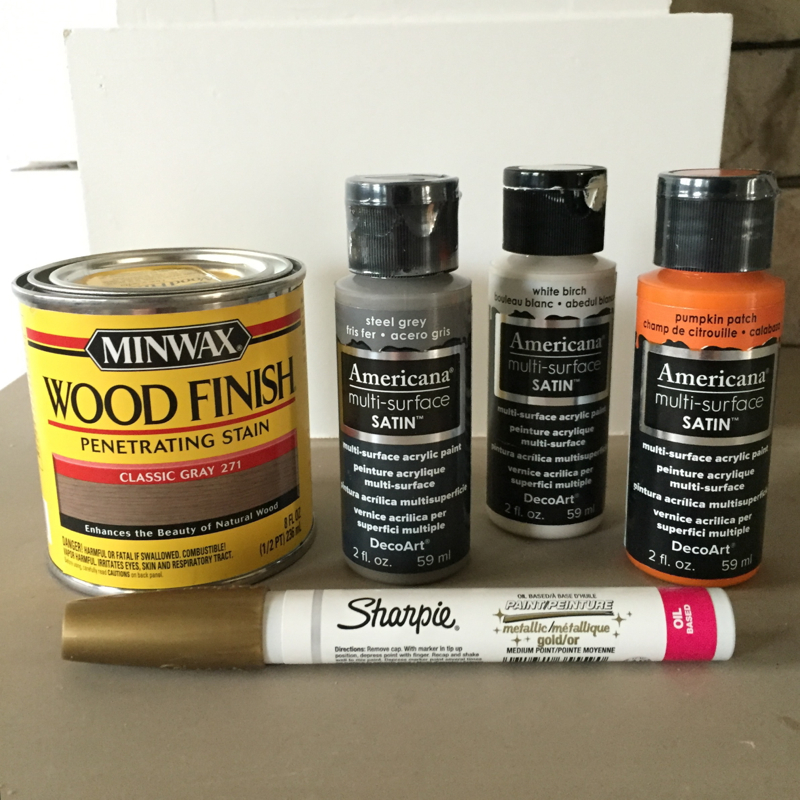
I used corner braces to adorn the corners of the snowman and used an oil-based Sharpie marker (in metallic gold) for a vintage touch. I absolutely love the way the Minwax Classic Gray stain took to this pine wood. The grain details are my favorite! They just stocked the front shelves with Christmas decorations at my local store, so I was able to grab a few faux greens to make it look even more festive!
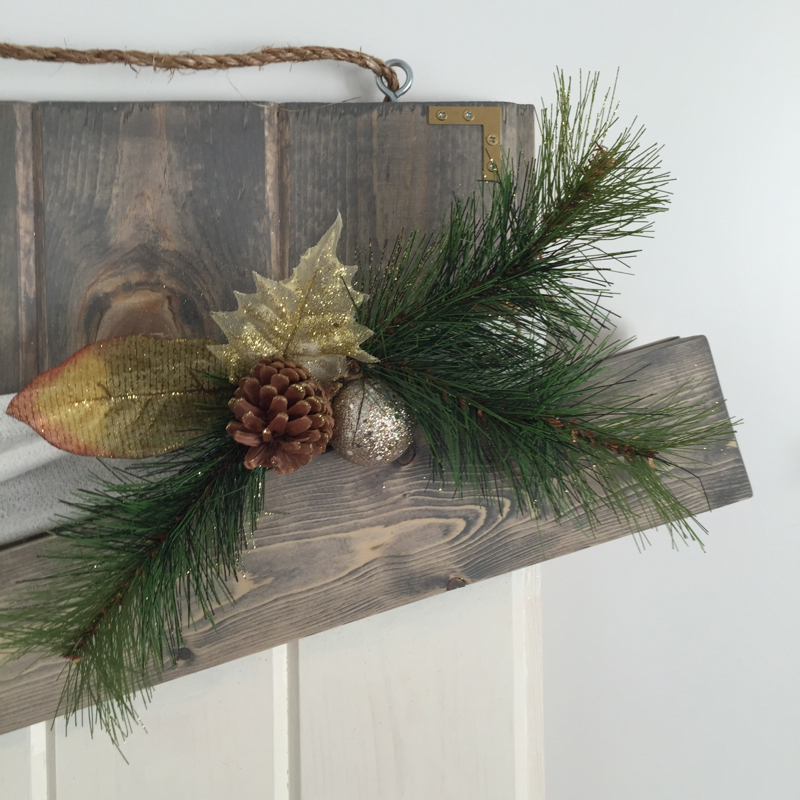
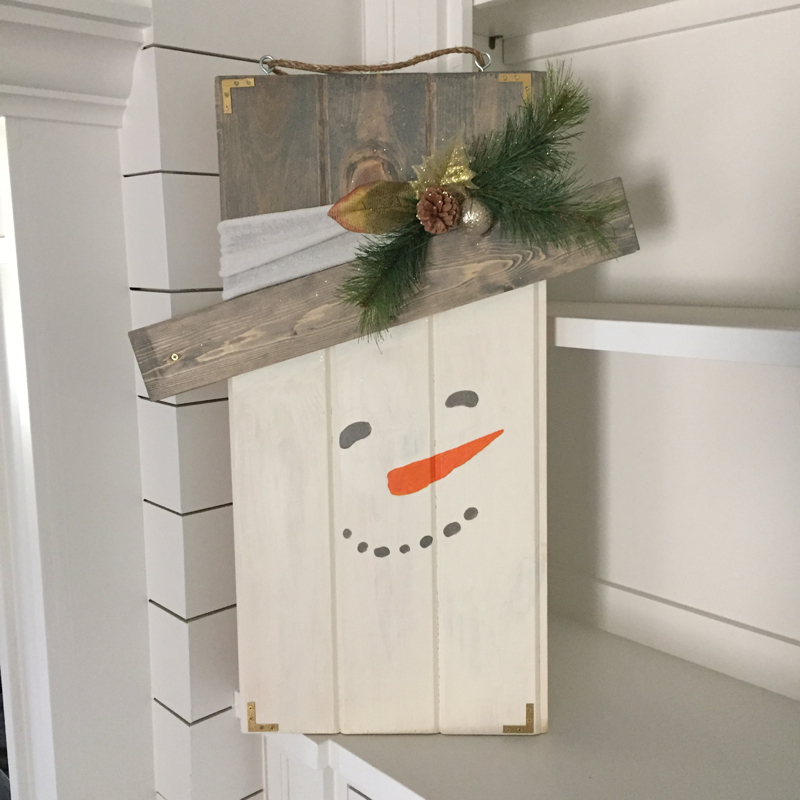
Our new home is still in the finishing stages, so I brought my completed project over to stage it in a few of my favorite places. The gray stain and stacked stone are a perfect match, don’t you think? :) I used some left over stain cloth to adorn the top of the hat brim… Layers make everything better!
 The Americana paints (pictured above) were used to design the face of my snowman… Here’s a close up of the details. I just love how it turned out!
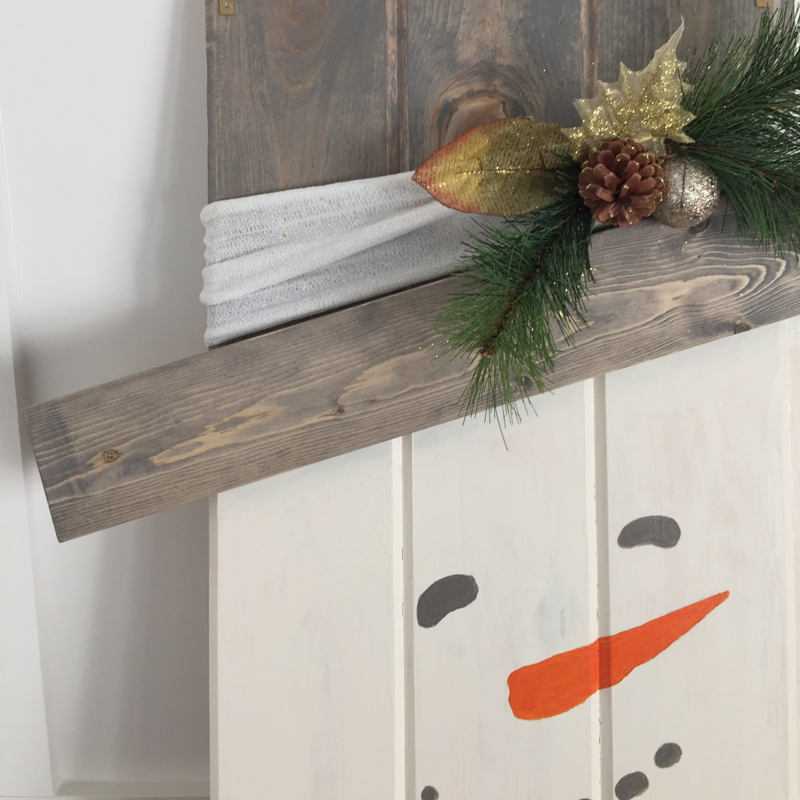
Please join us in making this seasonal character door hanger! I’d love to see what you come up with! Click the link below to register for a Do-It-Herself Workshop at http://workshops.homedepot.com
The Home Depot #DIHWorkshop
Thursday, October 20th
6:30pm – 8:00pm
The Home Depot provides FREE workshops at all their locations for do-it-yourselfers of all ages and levels of experience!
There are three types of Workshops offered:
Do-It-Yourself (DIY)
Do-It-Herself (DIH)
Kids
You can learn how to build decor projects, how to make easy home repairs and how to operate tools through demonstrations and step-by-step instructions!
Visit their website at The Home Depot to learn more!
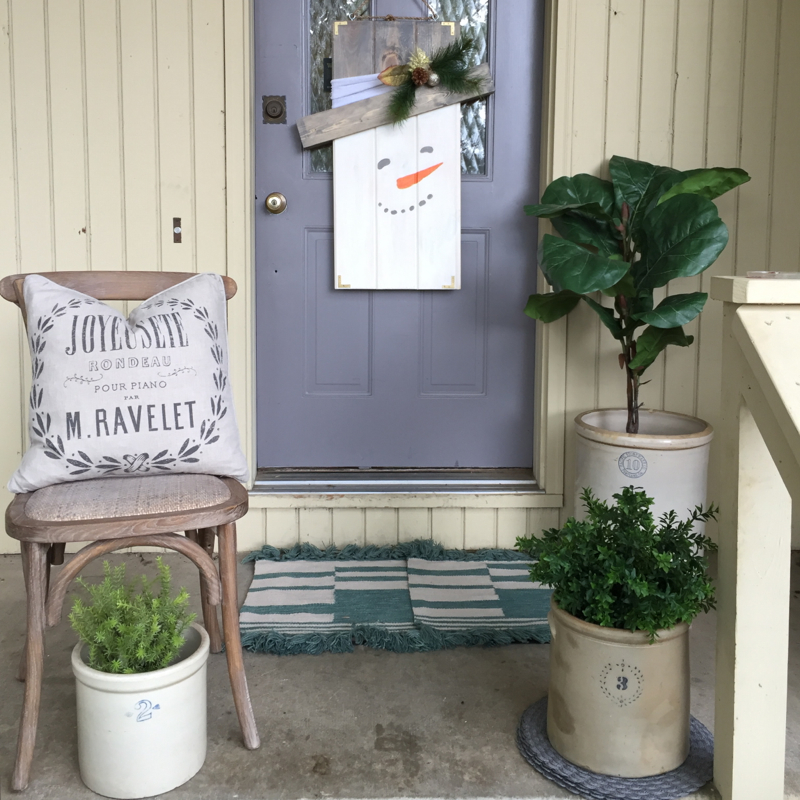
Our temporary front porch is looking so cute with my vintage snowman and a few of my favorite antique collectables! I hope you’ve enjoyed reading about my seasonal character door hanger reveal with The Home Depot and take the opportunity to sign-up for a class on October 20th!
Blessings,
![]()
I acknowledge that the Home Depot is partnering with me to participate in this program. As a part of the program, I am receiving compensation in the form or products and services, for the purpose of promoting The Home Depot. All opinions stated above are my own and my experience with the brand and its products.
It’s soooo pretty Alicia! I love him! He has the cutest face and I love that hardware! Bravo! xoxo…
That pine sprig on his hat! SOO sweet
Thanks, Natalie! It needed a little something! :)
I love the metal details on it. Such a fun touch.
Thanks, Vanessa! It was a fun project! Thanks for stopping by and reading my DIH post!
Adorable Snowman! Love the embellishments!
Thanks so much, Erin! Happy Holidays!
Can you tell those of us that missed the workshop what size wood, materials and directions so we can create in our own at home?
Thanks!
Jessica
Hi Jessica… I believe you can find that information on The Home Depot website. Sorry for the delayed response.
Super cute! Can I ask what you used the sharpie on? And what do you have it hanging from on your door?
I missed the class but I am going to make one!!
Hi Kim… Sorry for my late reply, we were moving into our home around the time you left this comment. The gold sharpie marker was used for painting the corner brackets, they were galvanized in the package. The door hanger is hanging my a thick rope and a metal door hanger was used that goes over the top of your door. Hope that helps!