Hi and welcome to our Favorite Christmas Desserts Tour! I hope you enjoyed Kara’s Cranberry Cream Cheese Ball recipe… I can’t wait to try it! I’m so excited to be amongst some of my favorite bloggers to share our favorite holiday treats! Thanks to my friend, Summer at She Leaves A Little Sparkle for organizing this fun and festive tour… We’re glad you’re here!
My family loves red velvet, so when I came across this recipe adapted by Your Cup of Cake, I just had to try it! It was my first time to do some real baking in our new kitchen; I had so much creating this treat for my family. My husband absolutely loved these (he’s the biggest fan) and my kids had a delicious after school snack waiting for them! So, without further ado, here is the recipe for Red Velvet Crinkle Cookies with Cream Cheese Frosting!
 Ingredients
Cookies:
1 box (I used extra moist) red velvet cake mix
2 eggs
1/3 cup oil
1 1/2 tsp. vanilla extract
Cream Cheese Frosting:
4 oz. cream cheese, softened
1/4 C. butter, softened
1 tsp. vanilla extract
3-4 C. powdered sugar
Directions:
- Preheat over to 375 degrees and coat cookie sheet with cooking spray.
- In a large bowl, combine cake mix, eggs, oil and vanilla extract.
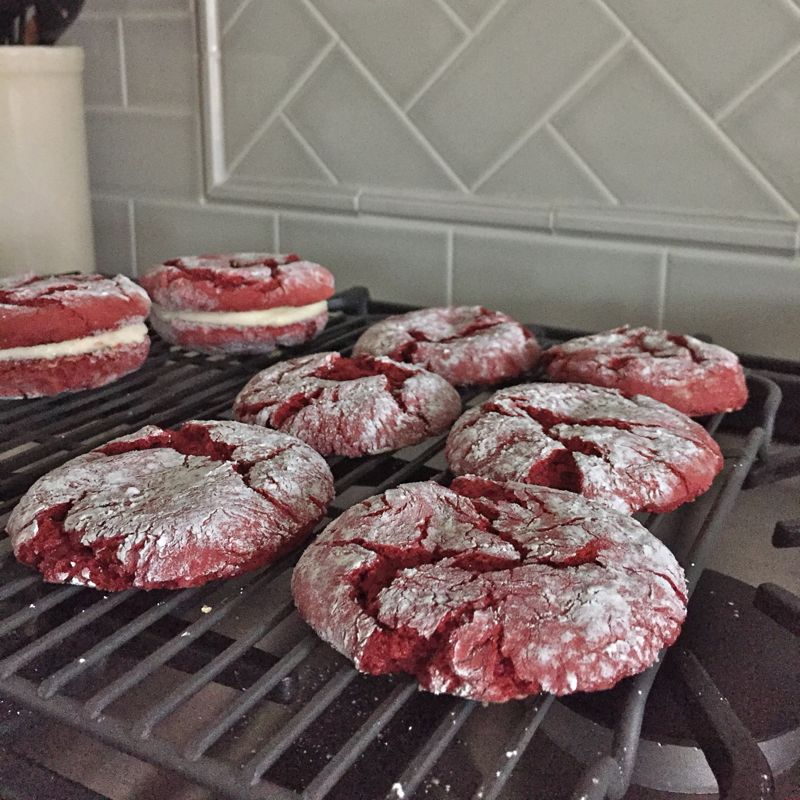
- With two teaspoons, scoop out dough (1 tablespoon size). The dough will be gooey, so using two spoons to scrap from to the other prevents messy fingers.
- Drop spoonful of dough into a bowl of powdered sugar and cover them generously. Then, place them 3 inches apart on greased cookie sheet.
- Bake for 8-10 minutes and let cool on cooling rack.
Cream Cheese Frosting:
Beat cream cheese and butter until smooth. Add vanilla extract and slowly add the powdered sugar until desired consistency. Spread frosting onto the bottom of half the crinkle cookies. Sandwich with another cookie; then roll edges in granulated sugar to add shimmer. This recipe makes 18 cookies or 9 sandwich cookies.
This time of year, my kids love when I break out all the makings for a hot cocoa station. It gets replenished several times throughout the month of December. I love to watch them pile their mugs high with marshmellows… By the end, their cute little mouths are coated with chocolatey goodness!
 These cookies pair perfectly with a warm cup of hot cocoa, don’t you think? I just love my holly dishes, gifted to me by my late grandmother. I pull them out every year, the day after Thanksgiving and we use them as our daily dishes until the New Year.
 These velvety treats didn’t last long in our house! The kids loved them and the last few we have left will be a sweet treat for me and hubs… Maybe we’ll leave one for each of them too! ;)
I’d love to know if you try these Red Velvet Crinkle Cookies with Cream Cheese Frosting; I hope you enjoy them as much as we did!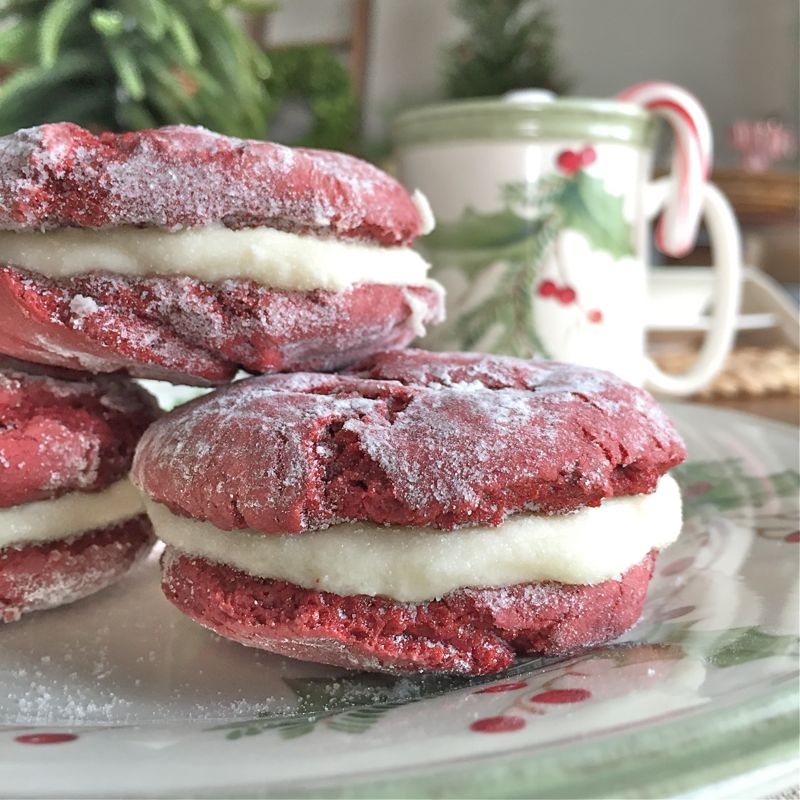
Our Favorite Christmas Desserts Tour will continue to make your mouth water! Head on over to see what my friend, Beth at Home Stories From A to Z created! You won’t want to miss the other amazing desserts shared by my friends. Visit the links below to find wonderful dessert ideas for your upcoming holiday gatherings!
Summer @ She Leaves A Little Sparkle
Chloe @ Boxwood Avenue
Laura @ Meaningful Spaces
Kara @ Lillian Hope Designs
Beth @ Home Stories A to Z
Amy @ Tonality Designs
Kara @ Kara’s Party Ideas
And me, Alicia @ Our Vintage Nest
Happiest of holidays to you and your family!
Blessings,
![]()
Oh my goodness these look divine! My mouth is already watering and I cannot wait to make these! Your pictures are beautiful and I love your hot cocoa station! Thank you so so much for joining us on this tour today, Alicia!!
Thanks, sweet friend! I have absolutely loved this holiday hop! You are so encouraging and fun… So glad I was apart of this! Happiest of holidays to you, Summer!
WOW!!! These sounds simply YUMMY!!! I couldn’t be more excited to have this recipe for this Christmas season! Thanks for sharing!
Thanks, Kara! They are so delicious! Thanks for sharing your recipe too! Hope you have the happiest of holidays with your family!
Oh my, these look soooo good! I bet your kiddos sure loved them! I am so sexcited to be on this fun tour with all of you amazing ladies!!
Thanks, Chloe! I’ve enjoyed this so much! Hope you have a Merry Christmas with you family, friend!
Oh my gosh this seriously looks so good!! Yum!
http://www.maggiealamode.com