Hi everyone! Hope you all had a wonderful Christmas and New Year! I can’t thank you enough for your support and continued interest in our new home. We’re closing in on almost three months now and with each passing day, it feels more and more like home! Today, I want to address how to style simple book shelves. The 9-foot bookcases in our living room have received a lot of attention and many of you have asked if there’s a good rule of thumb when decorating them. I hope these simple steps that I use help you when decorating yours!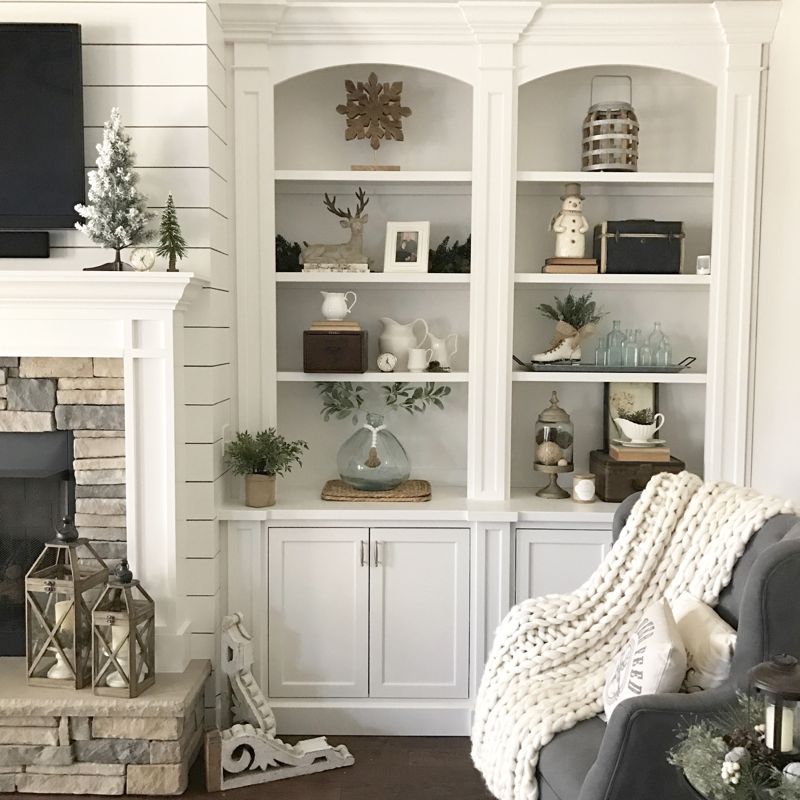
First of all, I don’t claim to have all the answers pertaining to this, but I’m more than happy to share the things I do to achieve a simple and cohesive flow. Currently, our bookshelves are symmetrical, but I have the option of adjusting them for a different look.
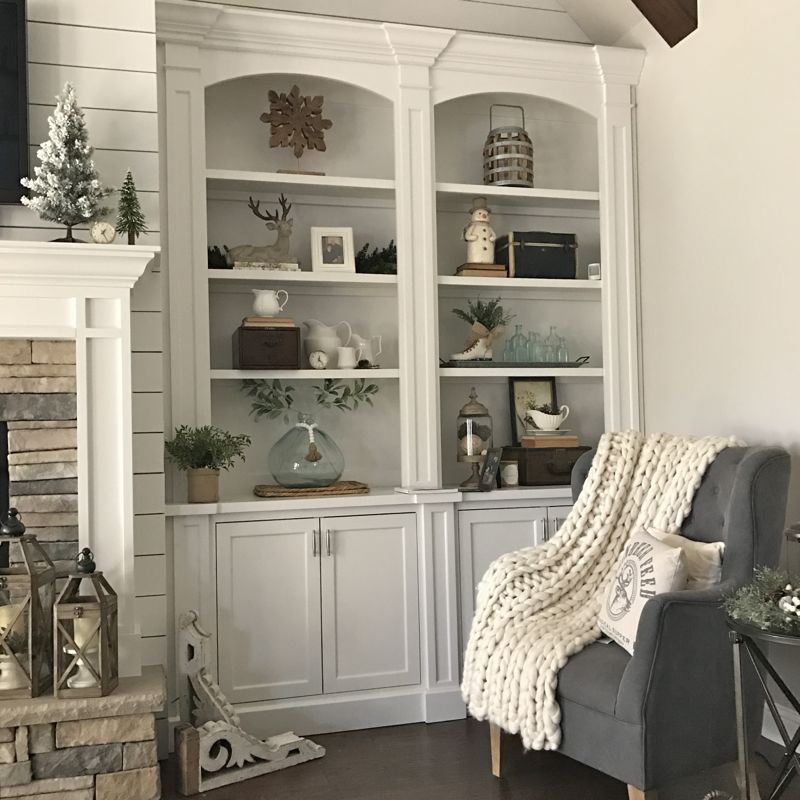
Most of the time in my decorating, I lean towards symmetry; it’s a good place to start if you’re not sure where to begin. Here’s a look at them during Christmas and now, in their current post-Christmas winter theme. I love to make the transition less severe by adding winter touches. It makes your home feel less empty after the tree and pops of color are put away.

 We finally added our 54″ flat screen above the mantle. I never thought I would agree to this, but after two months of not having one there, it started to feel unfinished and lacked the family room feel. This has quickly become our nightly gathering place and I love how the TV makes it more cozy in here!
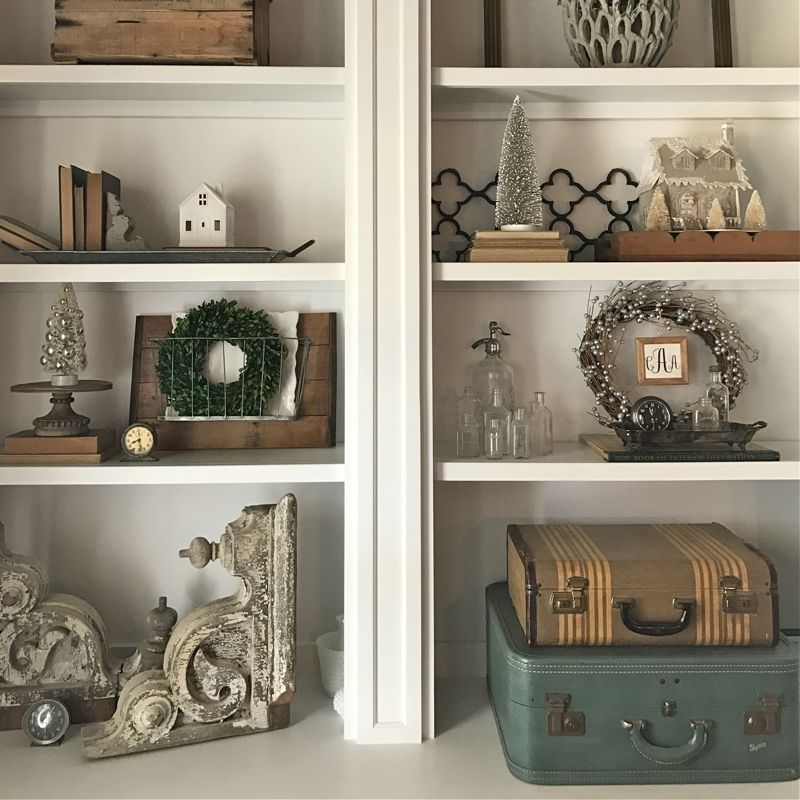
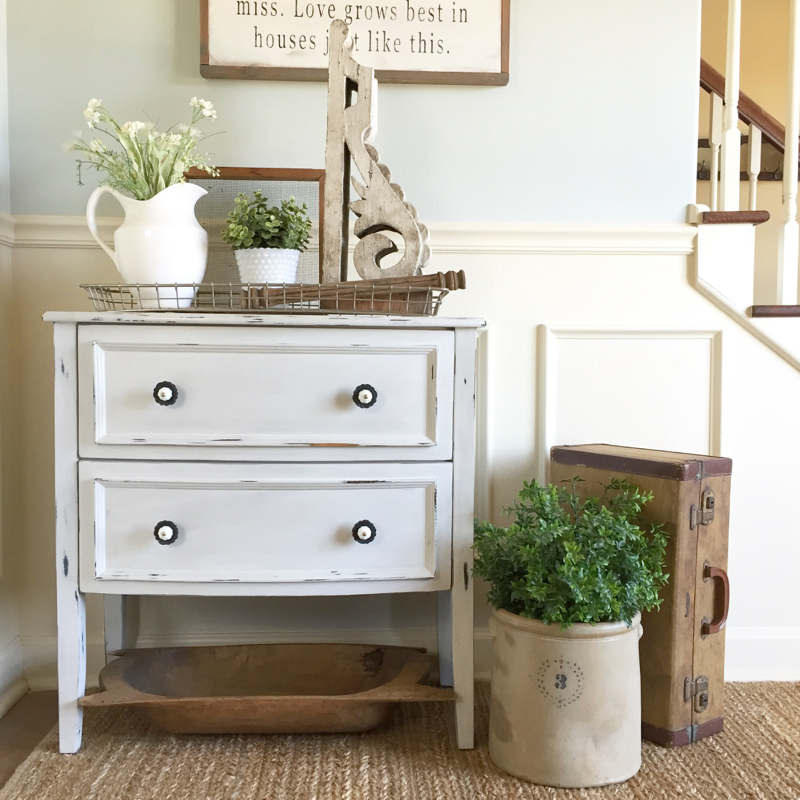
Here’s a close-up of a few vignettes on our shelves. I prefer to use old antique books rather than the tattered paperbacks my husband has collected over the years. I style my books with the yellow pages facing outward, it adds warmth and color, which I love. I also love using authentic architectural pieces, they add texture and interest and are a great conversation piece!
As many of you know, I tend to stay neutral, using minimal pops of color. During the seasons, I will replace certain items with themed pieces… It’s good to replace those items with similar sizes and heights to make the switching out easier. Many of you have asked where I store my seasonal decor when it’s not being used. I have a dedicated closet for smaller seasonal items and bigger things go in large storage bins in the attic.
When decorating a single shelf, I like to create the vignette in the center and eliminate as much empty space as possible. In my opinion, it’s pleasing to the eye and makes it look more even, especially if you’re working with symmetry. You want to have a good mix of different heights to add dimension. Step back and see what you’ve created and make necessary changes to help it flow, usually these are very minor… Maybe a slight adjustment or switch of two pieces. I’m constantly tweaking our home, as I walk by or if something catches my eye.
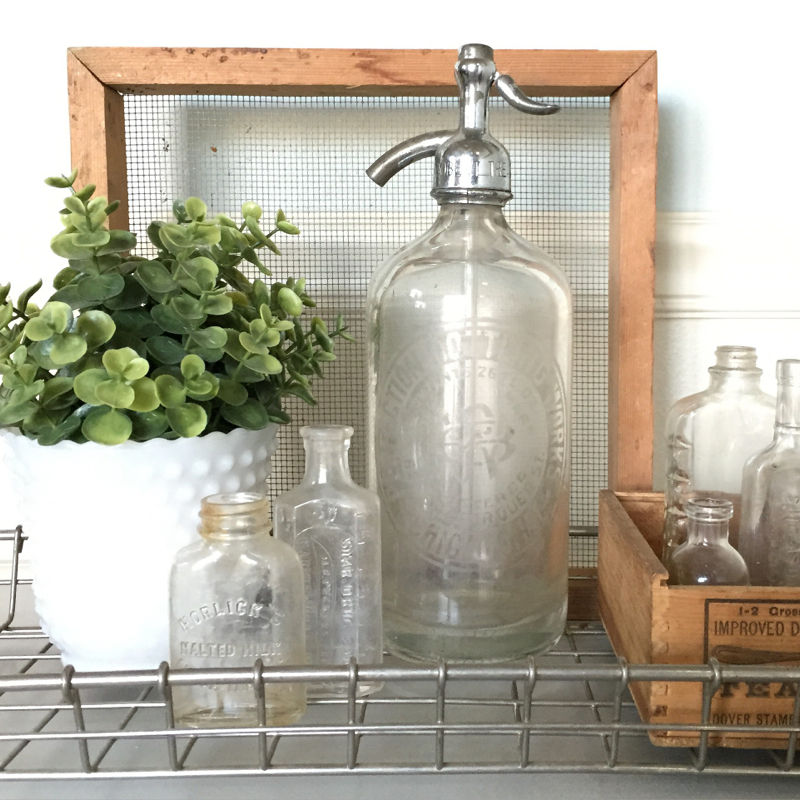
Take note at the diagonal use of colors here… The large blue vase is adjacent from my collection of old medicine bottles. I love to group collections together on my shelves… Old clocks, bottles, books, pitchers, as seen here.
Here are a few examples of some vignettes I’ve created over the years that would also make for beautiful styling on bookcases or multiple shelves.
I hope this has helped guide you in how to style simple book shelves in your home. Thanks for stopping by and please let me know if you found this information helpful!
Blessings,
![]()
OMG! You have me second guessing my decision to remove the TV from above our fireplace. My plan is to build shelving like yours on both sides and place. Smaller the on them like in your before picture……. eeekkk –
The look isn’t for everyone. I was pretty headstrong about not having it up there. But it didn’t feel complete in here without it and our options to put it elsewhere were limited. I’m happy with our decision… This time, hubby was right! Lol :)
Thanks. Very helpful.
Thanks, Kim! So glad you found it helpful!
This was great, Alicia!
Thanks for stopping by, Kelly! Hope you’re having a good week! :)
This was very helpful. We just purchased a c1915 farmhouse that was renovated & now has a large addition on the back. We hope to use it as a B & B someday. But right now I’m trying to figure out how to decorate. Thanks for the post.
You’re welcome! Glad you found it helpful! Best of luck with your renovations!
Hi. I am currently designing built ins for our home and I am trying to determine what spacing to put between each shelf. I do not want adjustable shelves. Do you mind telling me the distance between your shelves? They look beautiful!
Hi Suzanne… I’m sorry I’m not much help with this. I had mine made to be adjustable and have changed them several times to accommodate decor… I change things up quite often. I honestly couldn’t tell you what the spacing is from this post, because is varies all the time, depending on my re-arranging.
Gorgeous! Can you please share where that grey chair is from?!
Thanks! It’s from TJMaxx several years ago. Sorry I’m not much help!
Is the fireplace custom? I’m having trouble finding a shaker/craftsman mantel.
Hi Ellen… Yes, our fireplace surround and mantle were custom. I designed it with the builder.
Love the post!
Can you please dsrken the font?
Than you.
Hi… I would update your cache, as it stills read gray. I recently changed the font to black. Thanks!
Hi, i just love everything in your house!!We are using your fireplace and built-ins as our inspiration as we finish the final details in our house that my husband and brother in law are building. Would you mind telling us what type of stone you used for the fireplace?
Hi! We used a dry stacked stone that I hand selected from the masonry. Hope that helps and good luck with your project! 🌿
Looks beautiful! Can you tell me the dimensions of your fireplace (mantel height, width)? What are the actual dimensions of the wooden mantel? Thanks
Hi Rebecca… Thank you! It all depends on your wall space, each one will vary. We just have a standard fireplace and we custom designed the mantel and hearth to fit the space. Hope that helps!
Hi Rebecca… I’m sorry, I don’t have those specific details. It’s all based on the size of our room and the built ins on the left and right. Your space may not be the same size as ours. Thanks for your kind words!
I am starting the built ins with the shop lap on the fireplace. Could you tell me if the shiplap rap around the fireplace is mitred or is it butt joint.
Thanks, it looks terrific.
Hi Gary… Unfortunately, I don’t have the details as to how the shiplap was installed, cuts, measurements, etc. It was all apart of our semi-custom build almost two years ago. From looking it at, it appears to be mitred. Thanks for your interest in our home and I hope this info helps!