Hi friends! Goodness… What a whirlwind these last few weeks have been! Most of April was spent designing the updated spaces in our guest bath and laundry rooms. Adding character with patterned tiles is something I’ve always wanted to do in these rooms, so when the opportunity to partner with Riad Tile was presented, I knew it would be a perfect fit!

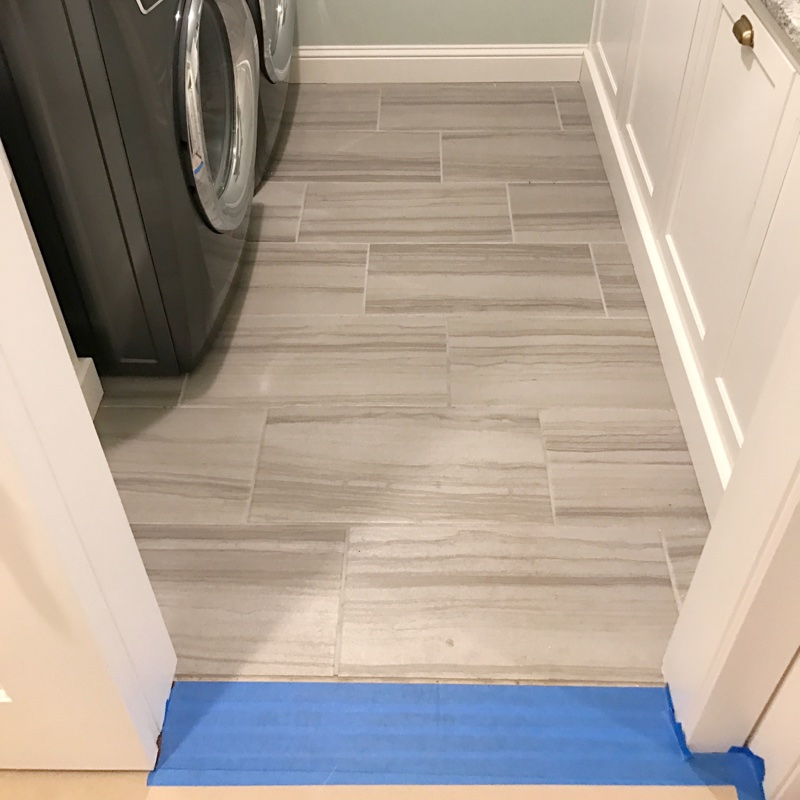
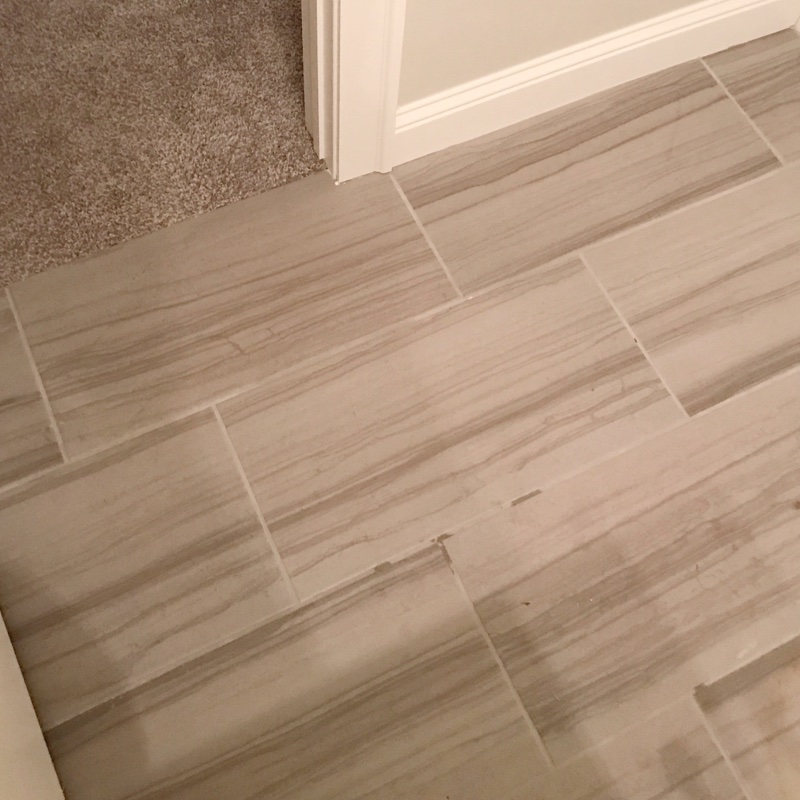
I thought it would be fun to start with a little back story regarding these rooms. Two years ago, when we were picking out the interior details for our home, we quickly discovered we were limited on flooring choices. To stay on schedule, it was suggested we choose from what the showroom offered. At the time, I envisioned a beautiful deco tile for the laundry room, but was told a special order would set us back two weeks and that style of tile was not recommended in a small space. I disagreed with the latter, and decided it was best to move forward with our current options to keep us on schedule. We settled with a neutral gray wood grain tile, as it was the best choice at the time. Here are a few views of that tile in our laundry room before demo began.
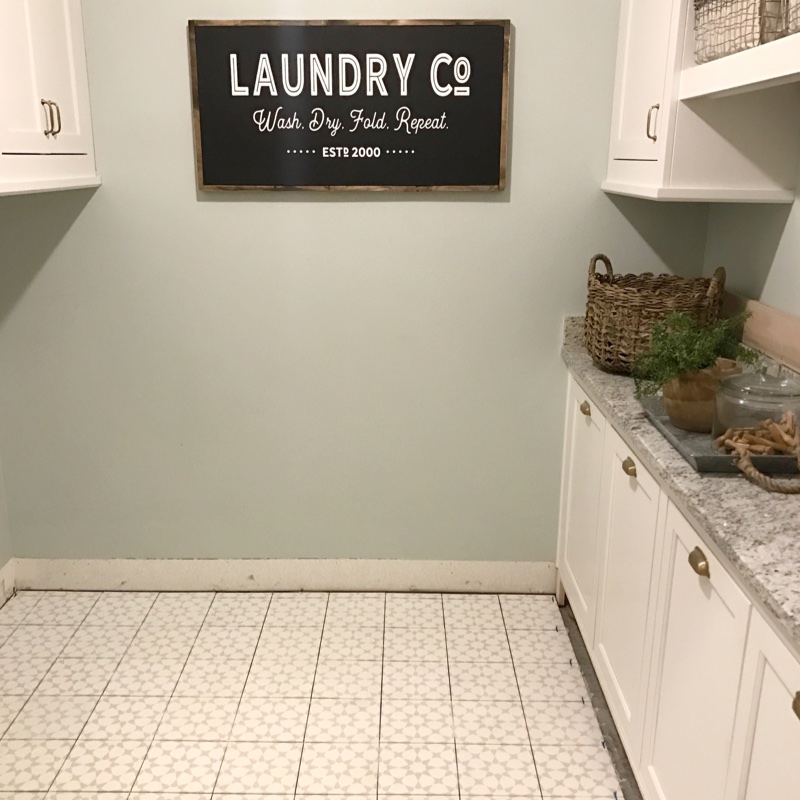
Before – Laundry Room
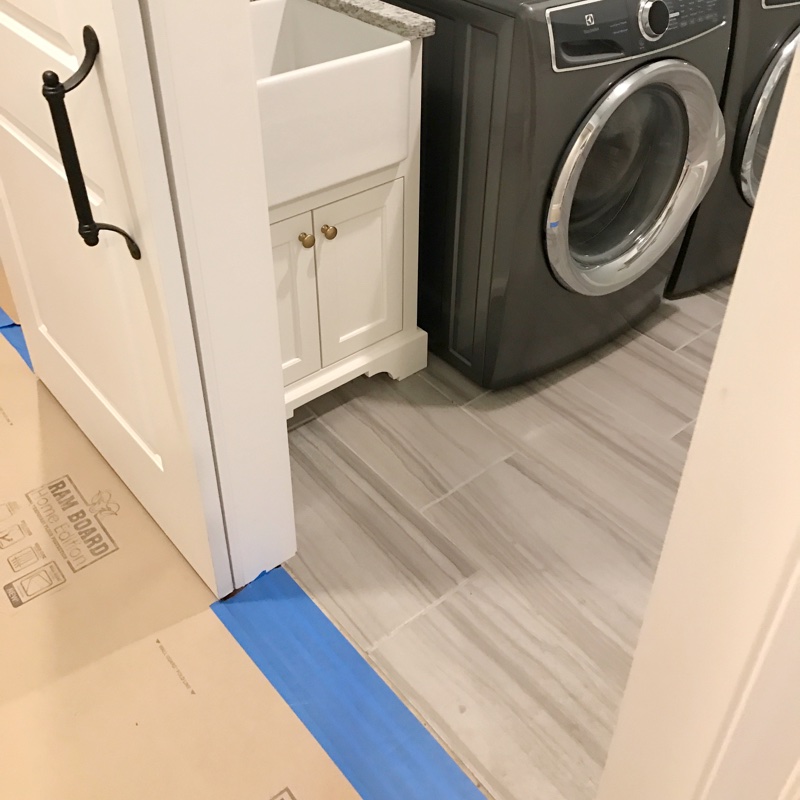
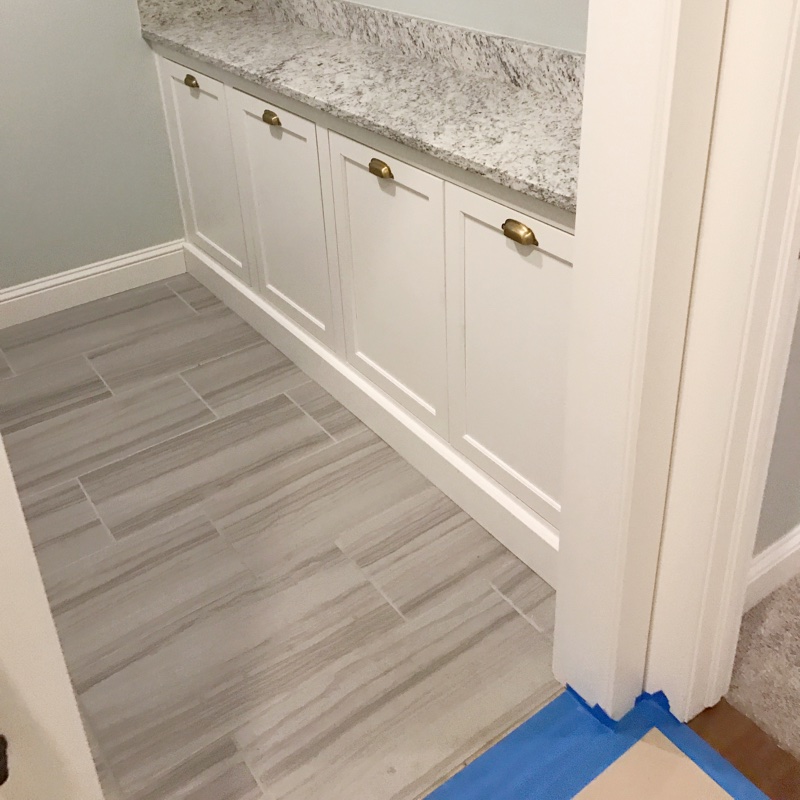
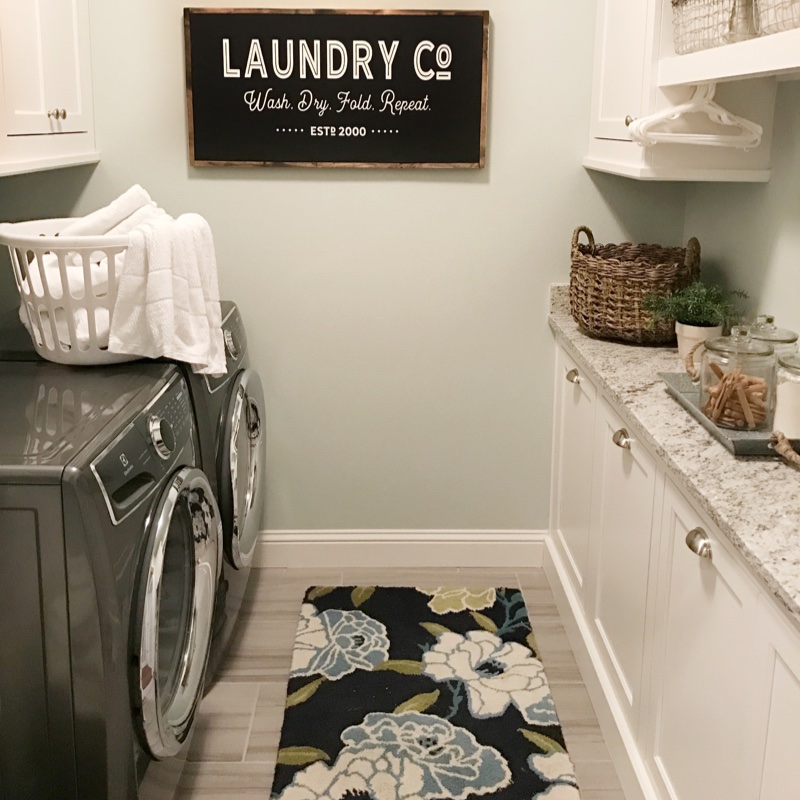
Above, is a before photo of the laundry room (styled) and while I love the functionality of this space, the gray tile wasn’t at all what I envisioned. In recent IG posts, I had mentioned changing the paint color in this room. I’ve decided against it at this time, and so the color, Sea Salt by Sherwin Willliams remains. This floral rug (that I’ve had for several years) has helped in hiding the multitude of gray. Word of advice to those of you currently designing the interior of your new home… Go with your gut and don’t let anyone sway you from the visions you have for your home. I’m thankful for the chance to create the laundry room space I’ve always wanted with these gorgeous cement tiles from Riad Tile.
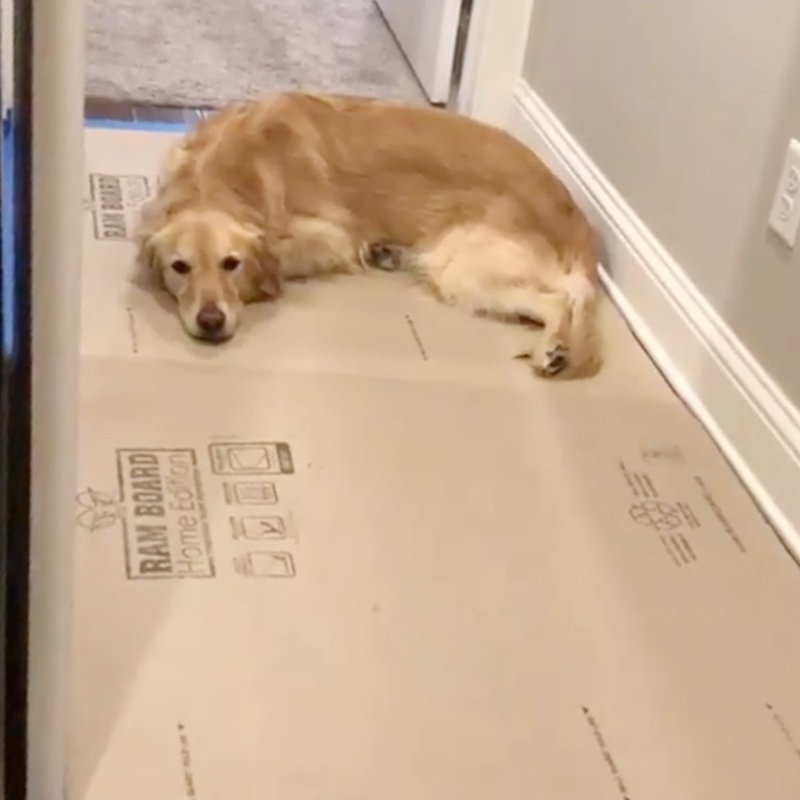
We wanted to make sure the tear out of the gray tile in both rooms was properly done, so I called a local flooring company to come in and do the demo. It took them most of the day to remove the tile and thin set with their air powered tile chisels. They contained the dust by taping off the room, protecting the floors with ram board and were very thorough during the process.
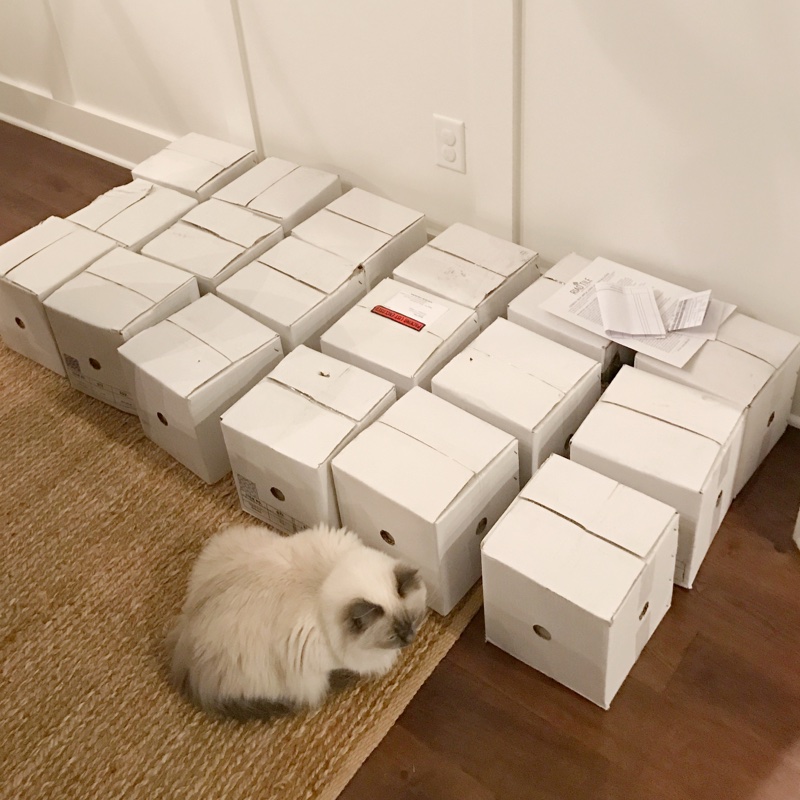
These two were such troopers during those crazy days of demo and install!
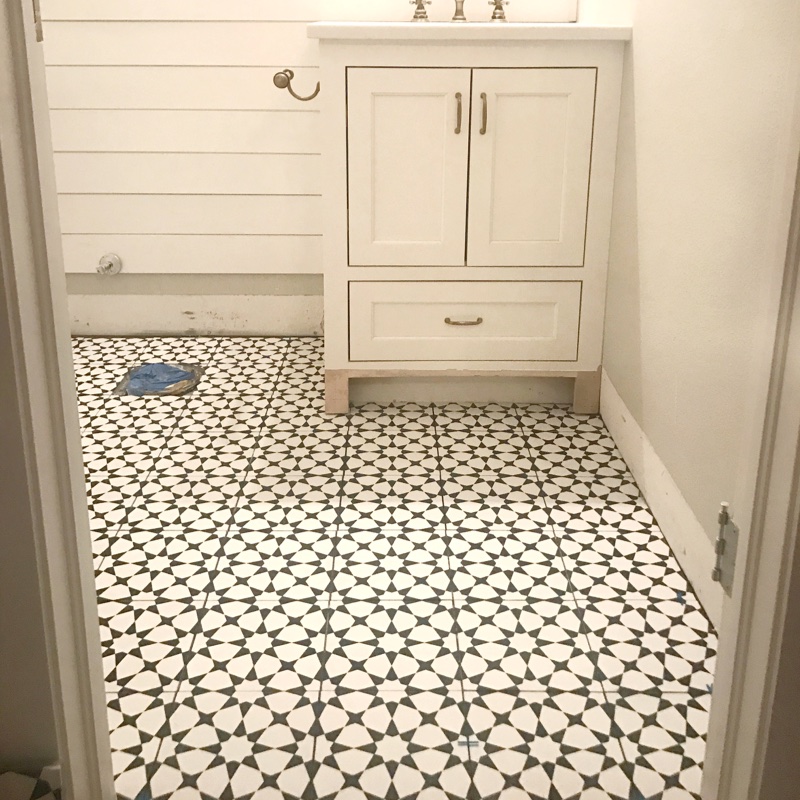
Below is the guest bathroom before demo, pardon the weird angles and mess. The same gray wood grain tile was in this room too, resulting in too much gray for a small space! The shiplap accent wall is still a primed white and may receive an accent color at some point. For now, the remaining walls are SW Agreeable Gray and the trim and cabinets are SW Snowbound.
Before – Guest Bathroom
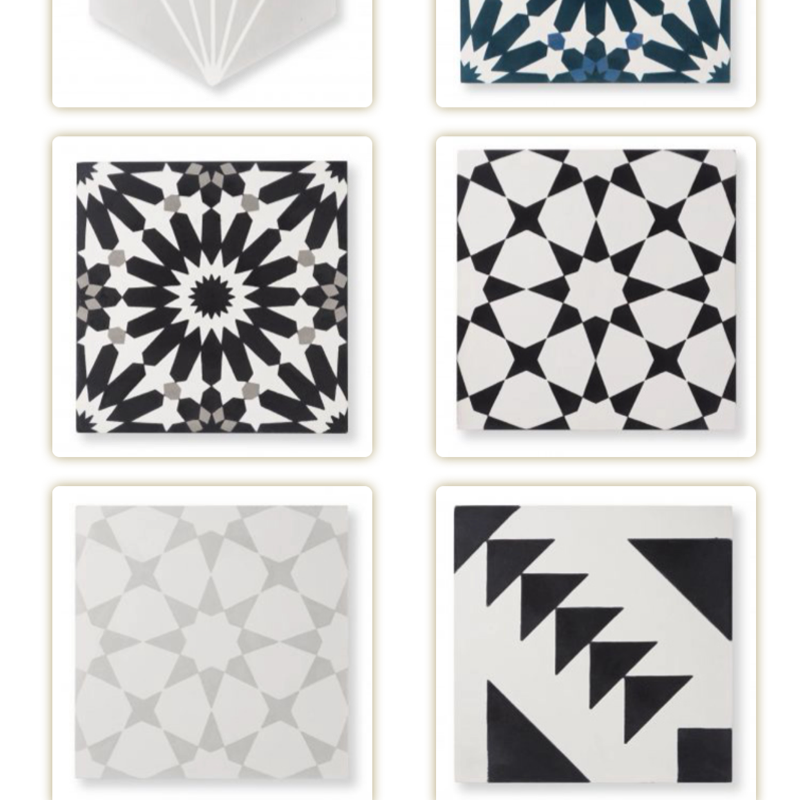
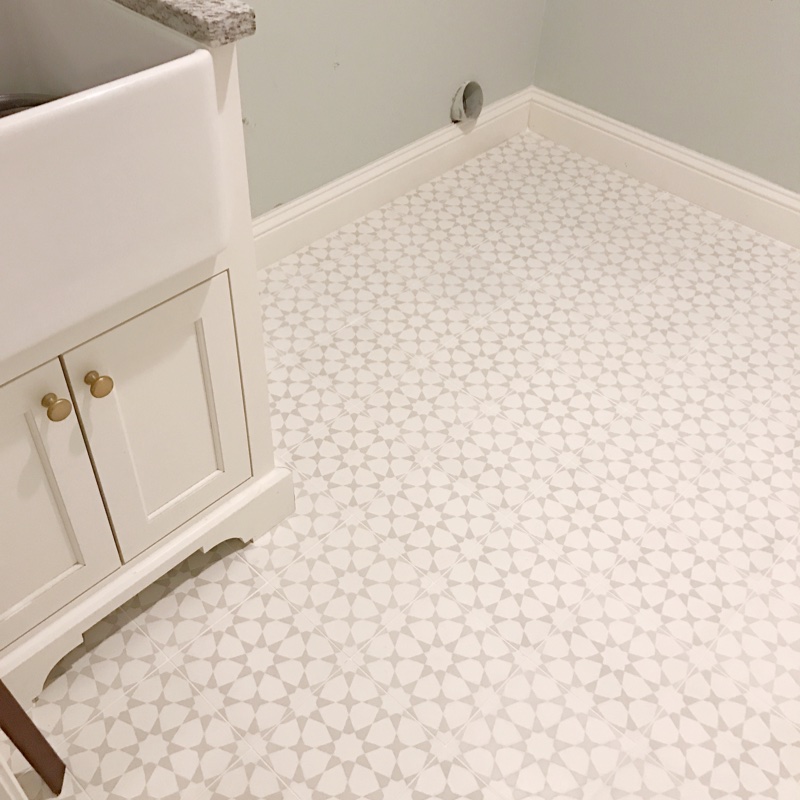
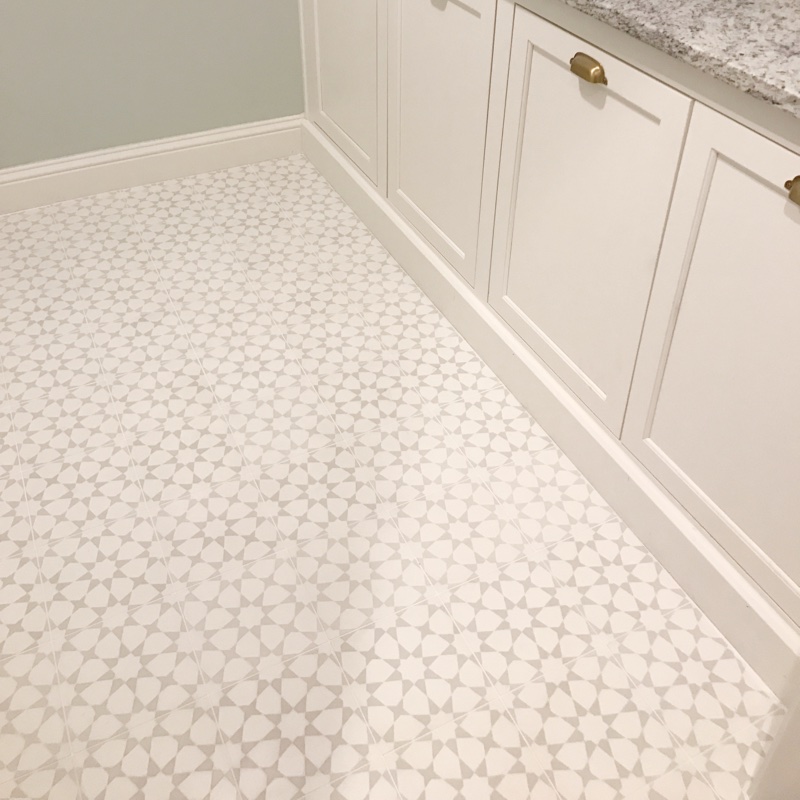
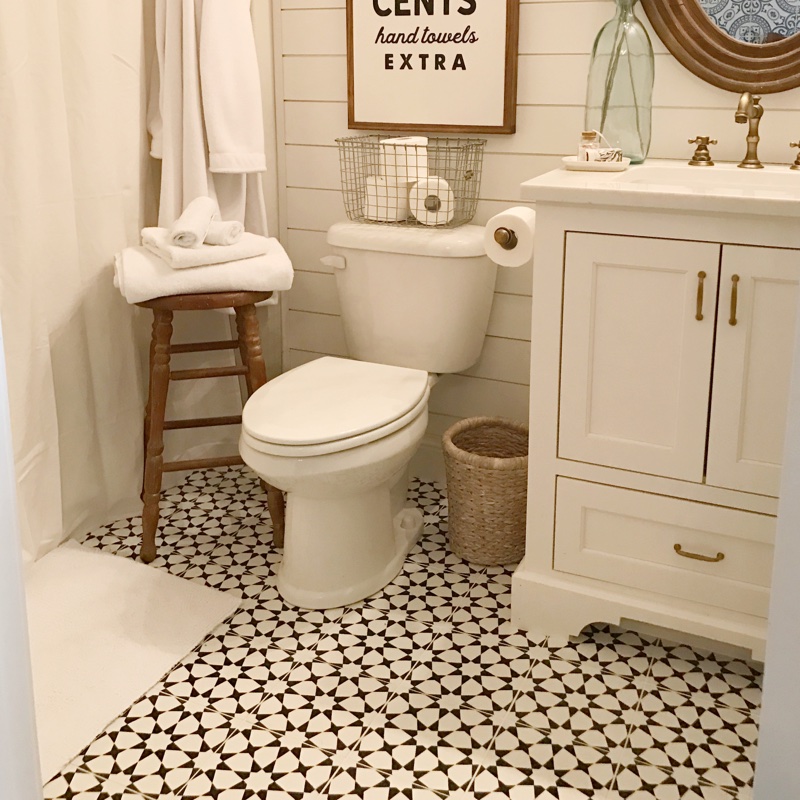
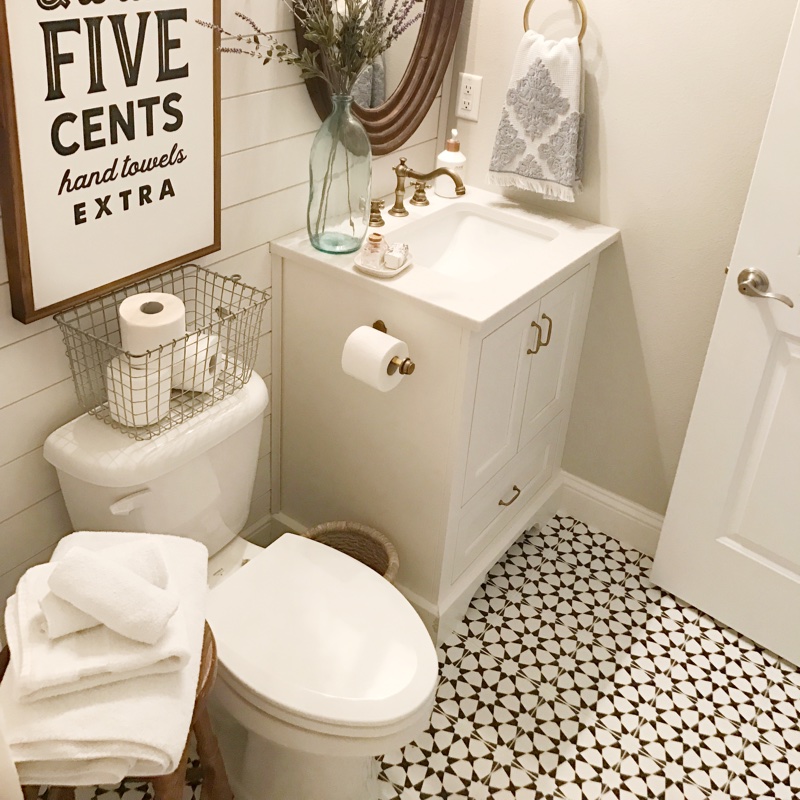
It was apparent that these two rooms desperately needed character, especially being small spaces. Selecting the patterned cement tiles was easy, as I had saved several images on Pinterest of what I hoped to create in these rooms one day. To my surprise, Riad Tile had the exact pattern I wanted to use! I loved it so much, I decided to choose the black version for the guest bath and the gray version for the laundry room. The tile I picked is called Estrella; it comes in black and gray. To give the laundry room a more open and airy feel, we went with the gray Estrella and I’m so thrilled with the results! Here’s a few progress photos of the install…

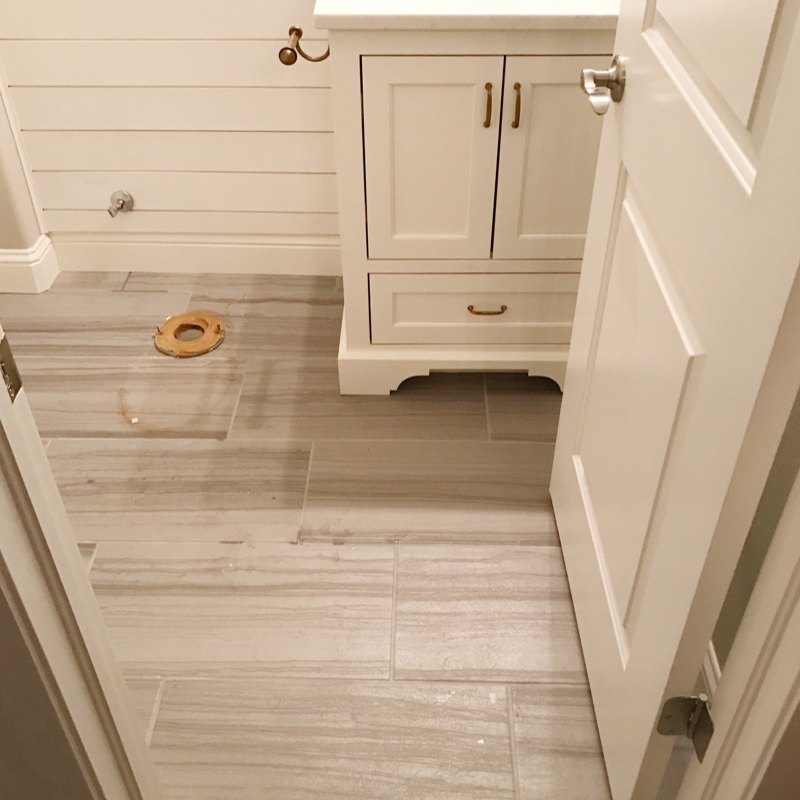
Prior to tile install, we requested that all baseboards and trim be removed. This cement tile is quite a bit thicker than standard tile, measuring at 5/8″. This is another reason it’s best to remove all the trim, to insure the installation is seamless. Here’s the guest bath during tile install…
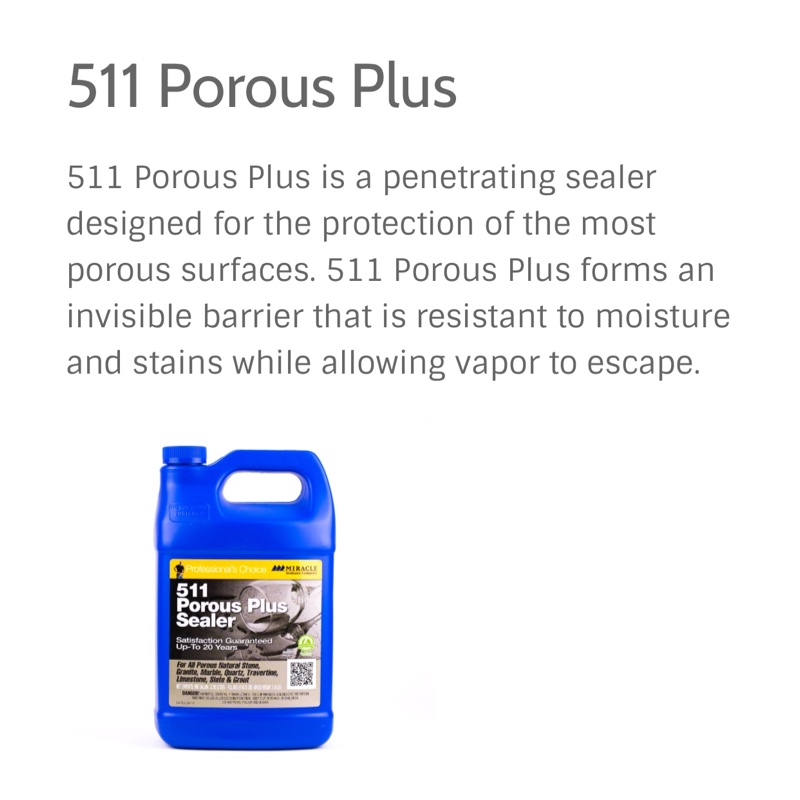
Please note: These next few steps are crucial in regards to the installation and care of this tile. Cement tile is very porous and if not properly treated and cared for, can result in damage to your tile. I’ve provided a detailed link below (directly from the Riad Tile website) on how to install, seal and grout cement tile. The order of steps is very important to insure lasting use and durability.
Installation and Care of Riad Tile
This sealant comes highly recommended by Riad Tile, and in their experience has provided the best results. This is what we used to seal both rooms. The link above also provides detailed instructions on how to seal your tile. I suggest waiting 48 hours after application before grouting your tile. Due to the thickness of this tile, I’d recommend allowing it to dry 24 hours before applying another coat of sealant. We then waited another 24 hours before moving everything back into the rooms.
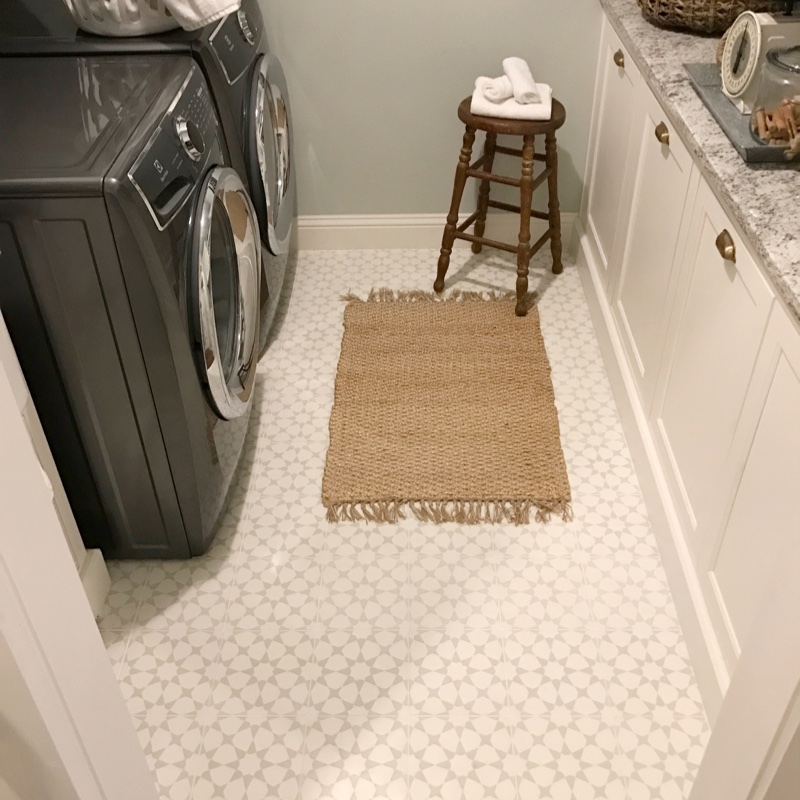
Here are a few progress photos of the laundry room after trim was reinstalled. The results are just what I envisioned and this gray Estrella tile provides the openness I hoped for!

So, now that I’ve shared all the details of the before, during, important steps and must-dos, how about the amazing after? Y’all I couldn’t be happier with how both of these rooms turned out! This tile has exceeded my expectations in creating the character I always wanted in these rooms! Enjoy the next several views of our newly updated guest bath and laundry rooms!
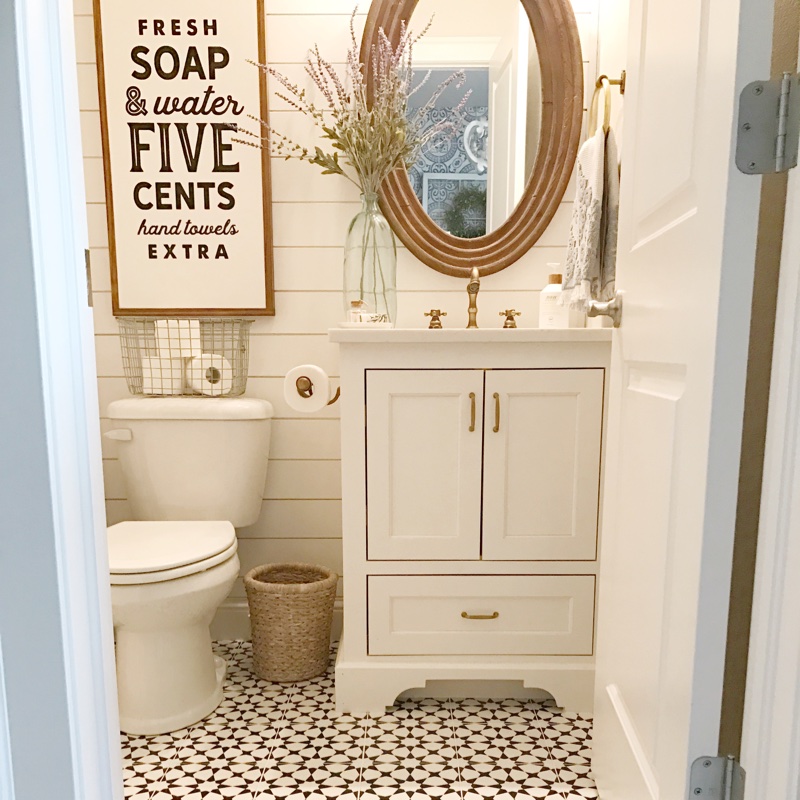
Guest Bathroom – After
(Black Estrella Tile)

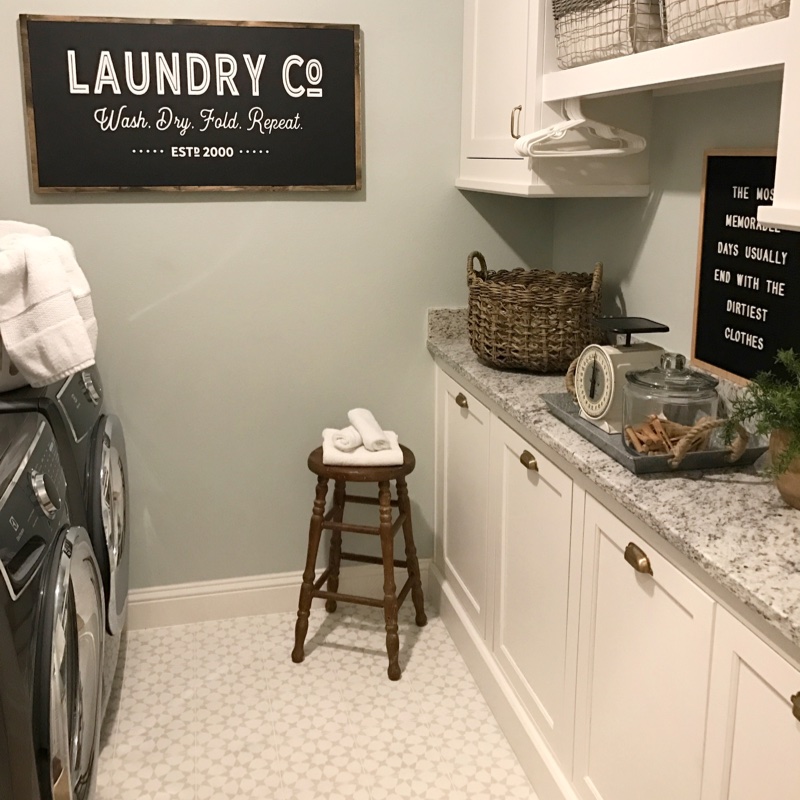
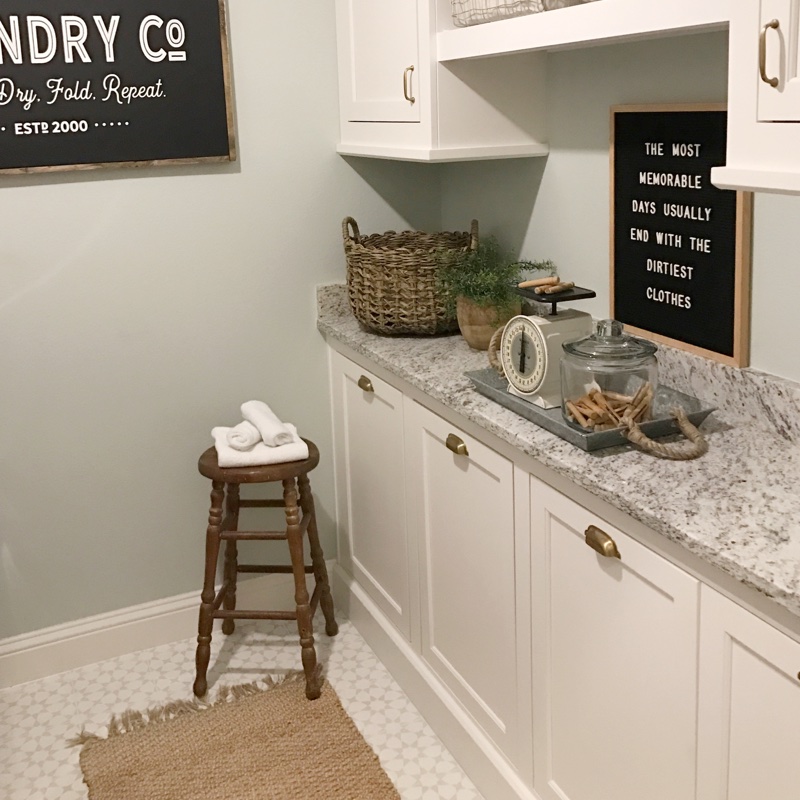
Laundry Room – After
(Gray Estrella Tile)
Amazing, right? Adding character with patterned tiles was the best decision for these rooms and I couldn’t be more thrilled with my experience with this product and the company! Thanks for sticking with me during this detailed post. There’s a lot of important information to review when working with this gorgeous handmade cement tile. If there’s anything I didn’t cover, please don’t hesitate to ask me below in the comments! Have a great weekend, friends!
Blessings,

I acknowledge that Riad Tile is partnering with me. As a part of this partnership, I am receiving compensation in the form of products and services, for the purpose of promoting Riad Tile. All opinions stated above are my own and my experience with the brand its products.
** This blog post contains affiliate links.
You did a fantastic job in creating 2 beautiful rooms.
Thanks, Terry! They were a lot of fun to create! I really appreciate your support and encouraging words!
Love the tile💕 beautiful job on both rooms.
Thanks so much, Amanda! Sweet of you to comment! We are enjoying the updated spaces!
Looks beautiful! Do you know where I can find a vanity/sink combo like yours for my laundry room? Thanks
Thanks so much! The vanity was custom designed and built by a local millworker. I have our farmhouse sink sourced in my September 2016 archives. Thanks for your interest!
Where did you purchase the rug in your laundry room?
Hi Angie… The woven jute rug pictured in our updated laundry room is several years old from TJMaxx. I see them there quite often, so you should have no problem finding one! ;)
Where did you get your sign from hanging over the toilet?! Love the tile. You did such a beautiful job!
Hi Morgan… Thanks so much! I have a swipe up link in my Instagram stories for the sign. I’m happy to send you a link via IG; you can DM me there for that info.
Can you please send me one too!
Can you clarify what you’re requesting? Thanks!
What grout color and manufacturer did you use in your laundry room with the Gray Estrella? Thank you
Hi… the manufacturer is listed in the blog post. We used a white grout.
Hi! We just bought the black Estrella tile for our powder bathroom because of your post! Can I ask what color grout you used? Getting it installed this weekend. Love everything you do in your home! Thank you!
Where did you get your bathroom vanity?
I designed it with our cabinet maker when we built our home.
I love the bathroom and the Black Estrella Tile. I think I might use it in our remodel. I’m not sure what to do with it in the shower though. Did you do anything special? I don’t see a picture of the shower. The grout is black on the floor tile and I wanted to do like a off white with brown grout in the shower and not sure if that will look good. :) Thanks for sharing your beautiful home!
Hi Lori… Thank you for your sweet words about our home! I did not use the Estrella tile in my shower area, just on the floor. I would suggest using a white grout with this particular tile. My blog post explains the reasons behind this… Hope that helps!
Love both colors of tile and your choices were spot on! You are so right about following your vision for your home, even if it takes a little longer. It prevents second-guessing yourself about your choices on other decisions as well. You are blessed that you were able to replace the first tile in both rooms. The new tile in both rooms, looks like it is the only choice that would work in those spaces. You have an incredible sense of style, which is an inspiration to many . Congratulations on your “re-do”. 🍃⚘🍃
Thanks so much! As an interior design blogger and influencer, my job is to promote/feature new products from companies that want to partner. Much of what you see on here is sponsored by the brand I’m representing. Appreciate your kindness and support!
Love the bathroom. We are getting ready to redo our powder room and love the tile and sink. Where did you get the sink?
Hi Stephanie! Thanks for your interest! The vanity and sink was designed by me and built by the carpenter when we built 4 years ago. The sink is just a builder grade style surrounded by quartz countertops. Hope that helps!